 |
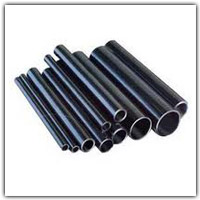
This specification covers nominal (average) wall seamless and welded carbon and alloy steel pipe intended for use at low temperatures. Several grades of steel are included as listed in Table 1. Some product sizes may not be available under this specification because heavier wall thicknesses have an adverse affect in low-temperature impact properties.
Supplementary Requirement S1 of an optional nature is provided. This shall apply only when specified by the purchaser.
The values stated in either inch-pound units or SI units are to be regarded separately as standard. Within the text, the SI units are shown in brackets. The values stated in each system are not exact equivalents; therefore, each system must be used independently of the other. Combining values from the two systems may result in nonconformance with the specification. The inch-pound units shall apply unless the "M" designation of this specification is specified in the order.
|
This specification covers nominal (average) wall seamless and welded carbon and alloy steel pipe intended for use at low temperatures. Several grades of ferritic steel are included. Some product sizes may not be available under this specification because heavier wall thicknesses have an adverse affect on low-temperature impact properties. |
Chemical Requirements
| |
Composition, % |
|
| Element |
Grade 1 |
Grade 3 |
Grade 6 |
| Carbon, max |
0.30 |
0.19 |
0.30 |
| Manganese |
0.40 - 1.06 |
0.31 - 0.64 |
0.29 - 1.06 |
| Phosphorous, max |
0.025 |
0.025 |
0.025 |
| Sulfur, max |
0.025 |
0.025 |
0.025 |
| Silicon |
0.18 -0.37 |
0.10 min |
| Nickel |
3.18 - 3.82 |
|
|
|
For each reduction of 0.01% carbon below 0.30%, an increase of 0.05% manganese above 1.06% would be permitted to a maximum of 1.35% manganese.
When Grade 6 is ordered under this specification, supplying an alloy grade that specifically requires the addition of any element other than those listed for the ordered grade is not permitted. However, the addition of elements required for the deoxidation of the steel is permitted.
|
Tensile Requirements
he material shall conform to the requirements as proscribed:
| Wall Thickness |
Grade 1 |
Grade 3 |
Grade 6 |
| in. |
mm |
Longitudinal |
Transverse |
Longitudinal |
Transverse |
Longitudinal |
Transverse |
| 5/16 (0.312) |
8 |
35 |
25 |
30 |
20 |
30 |
16 |
| 9/32 (.281) |
7.2 |
33 |
24 |
28 |
19 |
28 |
15 |
| 1/4 (.250) |
6.4 |
32 |
23 |
27 |
18 |
27 |
15 |
| 7/32 (.219) |
5.6 |
30 |
|
26 |
|
26 |
|
| 3/16 (.188) |
4.8 |
28 |
|
24 |
|
24 |
|
| 5/32 (.156) |
4 |
26 |
|
22 |
|
22 |
|
| 1/8 (.125) |
3.2 |
25 |
|
21 |
|
21 |
|
| 3/32 (.094) |
2.4 |
23 |
|
20 |
|
20 |
|
| 1/16 (.063) |
1.6 |
21 |
|
18 |
|
18 |
|
|
|
Impact Requirements
For Grades 1, 3 and 6, the notched-bar impact properties of each set of three impact specimens, including specimens
for the welded joint in welded pipe with wall thicknesses of 0.120 in. [3 mm] and larger, shall not be less than the values prescribed:
| Size of Specimen, min |
Minimum Average Notched Bar Impact Value of Each Set of Three Specimens |
Minimum Notched Bar Impact Value of One Specimen Only of a Set |
Impact Temperature |
| |
ft-lbf |
J |
ft-lbf |
J |
Grade |
Min Impact
Test Temp |
| 10 by 10 |
13 |
18 |
10 |
14 |
|
F |
C |
| 10 by 7.5 |
10 |
14 |
8 |
11 |
1 |
-50 |
-45 |
| 10 by 6.67 |
9 |
12 |
7 |
9 |
3 |
-150 |
-100 |
| 10 by 5 |
7 |
9 |
5 |
7 |
6 |
-50 |
-45 |
| 10 by 3.33 |
5 |
7 |
3 |
4 |
|
|
|
| 10 by 2.5 |
4 |
5 |
3 |
4 |
|
|
|
|
|
Mechanical Testing
Transverse or Longitudinal Tension Test and Flattening Test, Hardness Test, or Bend Test
For material heat treated in a batch-type furnace, tests shall be made on 5% of the pipe from each treated lot. For small lots, at least one pipe shall be tested.
For material heat treated by the continuous process, tests shall be made on a sufficient number of pipes to constitute 5% of the lot, but in no case less than 2 pipe.
Hydrostatic Test
Impact Test - One notched bar impact test, consisting of breaking three specimens shall be made from each heat represented in a heat-treatment load on specimens taken from the finished pipe.
|